

I know I promised to be back sooner with the second layout...but time snowballed away from me, and all of a sudden the weekend was over and now it's Wednesday!
For this layout I am using the text paper from the Jenni Bowlin embossed paper line. This sheet is black with a beige core.
I first laid out the papers and embellishments I wanted to use on my layout, so I would have an idea where I wanted to sand the paper. I took a picture of this so I could go back and check it out while I was sanding! It doesn't have to be exact, but it will give you a better idea where things will be when you're done.

I started by sanding all of the edges. Then I sanded bits of the rest of the paper. I wanted most of the focus to stay on the right side of the layout, so I left most of the left side untouched.
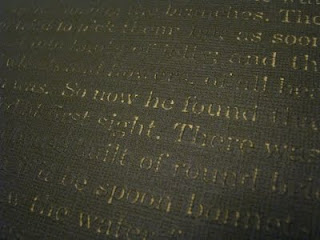
 Here's a close up of how it looks. I really love the text!
 The almost-finished layout...I need to print a photo, this one is just a stand in! The black background really allows the photo and embellishments stand out, but without being a boring black...it has some interest as well!
 You could also try:
- sanding certain words that accent the theme of your layout (for example, you can see near the bottom I gave extra attention to the phrase "you must remember")
- sand the entire page, but leave some areas lighter than others
- use bits of the paper as an embellishment...this would be especially neat if you covered a chipboard piece with it!
I hope you enjoyed layout #2 in this Technique. This week I want to finally tackle the 10 Second Studios metal...so wish me luck and meet me back here on Friday!
later skater alligator
3 comments:
I need to get me some of that paper now!! :)
Awesome layout Lisa! In to my scraplift folder *grin*
Good luck! (You asked for it) I love love love Ten Seconds, can hardly wait to see what you've done!
Post a Comment