Friday, December 11, 2009

TOTW - Yarn Sweet Yarn

Don't you just love to snuggle up in a warm blanket this time of year? With a pair of cozy slippers and a hot cup of tea? I know I love it...and you're probably wondering where I'm going with this!? Well, when I think "warm and cozy" I think of yarn &, wool. There's something so comforting about a knitted sweater or a homemade afghan blanket. And while I am not a knitter (I can cast on, knit and purl, but not in a straight line and I drop as many stitches as I make), I sure do appreciate a bright skein of wool!


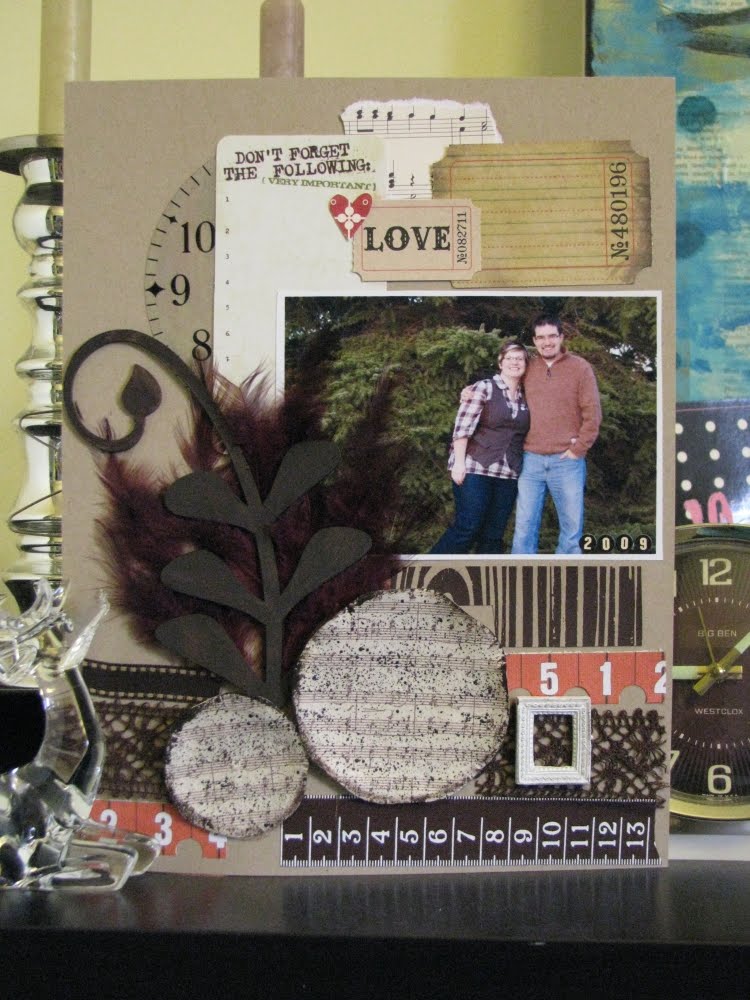
So my technique this week is using wool on a scrapbook layout! It was easier than you might expect.

On this first example I braided three strands of wool to use as an embellishment on my layout. Here's a tip to make it a little easier to braid the strands without them winding back on each other. Tie the three strands in a know, then pin a safety pin through the knot and into something sturdy and close by, like the ball of yarn or your pant leg.


Or you could always stick something heavy on top of it...like a coffee mug!

Since I was using very long pieces of yarn for this project, I tried to keep the ends in a bunch so they wouldn't get all tangled up together as I braided.
I used liquid glue and staples to attach my little braid to my layout. Play around with the placement of the braid before you glue it down, and you could put a little curl into it!


In this second example, I thread the yarn right through my paper!

First, pull out your Crop-A-Dile or Big Bite and punch some holes. I just eyeballed where they would go, but you could mark them first with a pencil.

The Big Bite is nice because you can reach in to all areas of your layout. If you don't have a Big Bite, you can use a paper piercer or one of those old-school hammer powered hole punches. You just need to make sure your holes are big enough to fit a giant strand of yarn through!

Then coming up from underneath, start threading your yarn through the holes. You can tape down that loose end...or you could start from the top and tie a knot for a little extra flair.
Keep going until you've reached your last hole. Finish underneath and tape that loose end down as well.
Shazam!


Take it a step farther and use different kind of textiles on your layout, like leftover fabric from a sewing or quilting project, ribbon or lace, felt or felted wool. You could also carry the theme into other embellishments and use buttons, zippers, pins or any other sewing notions.

Enjoy...and try to stay warm out there! I'm so looking forward to the high of -30 we're getting today! Yippee!

Friday, November 27, 2009

A Technique & A Shameless Plug!

I have a lot of sticker letters. A. LOT. But sometimes, I just don't have the right colour, or more importantly, I don't have enough of the right colour. This tutorial will give you a tip or two on customizing the colour of your finished chipboard letters.

You will need:

- white (or another light colour) chipboard or paper sticker letters
- ink (Staz On, Distress Ink, etc.) it needs to be a pigment ink, or one that fairly durable so the colour transfers properly and it doesn't rub off right away.
- a blending tool, like a piece of high-density foam (Ranger/Tim Holtz sells these in many forms, or you can just use a makeup sponge)


I'm using American Crafts Thickers because I had some on hand! Keep them on the backing sheet while you ink them...it's much easier this way! Then, when you've finished colouring them you can pull them off and stick them on your layout.


Get some ink on your blender of choice. I'm using the foam sheets by Ranger. Just cut them down to a workable size.


Now you want to blend the ink right onto the letter. I didn't do any prep to the letters before, but if they are very glossy or have a really slick surface give them a quick rub with some sandpaper.


And that's pretty much it. The colour doesn't show up very well in these pictures, but it's the idea that I really wanted to showcase. They have a really neat vintage-y, distressed, aged kind of look to them because the ink is naturally darker in some areas than others.


You could also try:

- using Glimmer Mist, but you will need to sand the letters first
- Crackle Paint
- Alcohol inks...the glossy surface of a finished chipboard letter is perfect for alcohol inks. Just add a couple of drops and let it dry.
- Embossing powder...takes a little more time, and remember to hold onto those little letters with tweezers or something!

And now it's time for the shamless plug! I put these fabby new letters on one of the layouts in my fabulous Calendar Workshop! It is a super-fun class/workshop/kit, filled with twelve awesome layouts and lots of product at a great price!

Here is October's layout, with the new letters on it!

You can find pictures of each layout on the TM Classes Blog (tonight they will be up...I promise!) and I'm doing up a post for the main TM Blog as well. The classes were scheduled to start in November, but if you want to sign up we can still cover a lot in the remaining classes in December (the 2nd and 9th).

The kit itself will be for sale next week, filled with all the instructions and full colour pictures you will need to complete each layout on your own time. There are a lot of fun techniques in the calendar, and by coming to the store to complete it, you'll be able to use some fun product as well. Stuff you might not have at home!

I am really excited about this workshop...a lot of my blood, sweat and tears went into this calendar! And I hope that y'all can get a little inspired by this project and maybe tackle something similar for yourself this season. It not only makes a great Christmas present, it's a great reminder of the wonderful year you had and all the memories you will be making next year!

happy creating!

Friday, November 20, 2009

TOTW - Feathers

Awhile back, on a whim, the Saturday girls made a special Craft Store Field Trip and bought a whole whack load of feathers to make some hair clips. And when I say whack load, I sure mean it! I have a tonne left...and I thought I would put them to good use on a scrapbooking layout or two!


You will need:
- feathers, which you can purchase at Michael's for sure, but probably at other crafty type stores, or fabric stores.
- liquid glue, which I find is the best to attach them nice and good! Glue dots would also work.


Layout #1: Feathers & Chipboard
Adding some feathers to the back of a chipboard shape, finished or raw, is a great way to add some texture and dimension to an otherwise flat shape.
Turn your shape over, so the back side is facing up, lay down some liquid glue and start pressing your feathers down. Every once and a while, check out the right side of the shape so you know they are going in the right place


I really like how the feathers look behind this Riff Raff leaf. You could try adding flocking powder to your shape before adding the feathers for a different look altogether.


Layout #2: On their own...


A couple of feathers in a little bunch looks super great on any page! And in any colour. Tie some ribbon around the stems and call it a day!


You could also try:
- using larger feathers as a border along a photo
- putting a circle of feathers behind a flower
- using feathers as an embellishment on a layout about birds, or bird watching

Happy Creating!

Saturday, November 14, 2009

Mish-Mash


I couldn't get my hands on the metal tools this week, so I decided to give you some simple ideas to use product in a way you might not have considered.

You will need:
- Hambly transparency
- found items
- pattern paper


A new way to think about Hambly transparencies...

Hambly transparencies are great to use as a whole, but they can also be cut apart to create movement and interest on your layout. I used the fall leaves transparency to add a little bit of colour and to reinforce the lovely fall colours in the photo, but I didn't want to use the whole thing. So I cut some of the leaves apart, "scattered" them along the layout as if they were falling down the page. I also added one to the centre of the letter "o" to bring some of that bright yellow colour to that side of the layout.


A new way to think about "found items"...

"Found items" are anything that wasn't originally designed to be a scrapbooking embellishment. For example, clothing tags, stamps, pop can tabs, etc. etc. etc. The list goes on forever! It's always fun to add some memorabilia to your layout, but you can also add things that have a great colour or texture that might not fit the "theme" of your layout. The gold and black strip down the middle of the layout is the spine off the outside of a kid's "Golden Book". I love the shine and the pattern, so I kept it once it fell off the book and I think it adds a nice sparkle to this layout.

A new way to think about lettering...
The letters for the word "joy" are the leftovers from a banner I made out of pattern paper. If you go back a couple of technique posts, you'll see one I did with the word "Autumn". I drew big letters on my pattern paper, then cut them out to make the banner. But I hate to throw things away, so the words get repurposed on layouts. If you have a die-cut machine, it would make this much more exact, and potentially much quicker. And it adds a lot of fun colour, without having to use a lot of busy paper!
I hope these little tips give you something new to think about the next time you play with your supplies. Try using things in a different way than you normally do, and see what happens!


And I would like to say HI to Electra, and thank her for the fun time I had on our "play date"
today! I hope you really enjoyed the class and make use of some of the techniques at home!


I'll be running the "Unleash the Artist Within" class again in the new year. If you like the techniques I demonstrate here, but don't have the supplies or the confidence to try them in the privacy of your own home, you should come to the class! You can use the store's supplies - we have lots to choose from - and let loose in a no pressure, everything goes environment! Keep watching the blogs for more details.
later skater alligator...

Friday, November 6, 2009

*new stuff*

So when I'm in a Technique rut, so-to-speak, and I can't think of anything new to show you, I usually just grab some new product and play! And that's totally what happened this week.

I have been waiting so patiently for the new Hambly to come...and now that it's here I am so happy to finally sit down and play with it.

The doilie rub-ons are so beautiful. The pictures don't do the colour justice! It's the perfect Hambly turquoise...I think it would go great with the Frozen Lake or Turquoise Blue Glimmer Mist.


Other new stuff on the page:
-Making Memories Vintage Findings...those gold thingys. This new line is unlike anything I've seen from them before. Lots of paper ephmera, vintage buttons, hat pins, ribbon, post cards and more. There are big and small packages with a variety of fun things inside, or you can buy packs of the same labels, buttons, or tags. The price point on everything is pretty decent, and Making Memories has some vintage paper lines that make for great scrapbooking and paper crafting.

- Making Memories Halloween Line...the litte word stickers. I love little words like this, and the Halloween line not only has some fun Halloween words - ghosts, monsters, boo - it also has some normal words like girls, buddies, fun, etc.

- Sassafras paper...the letters. The new Sassafras paper is all very awesome, a little quirky, and so very colourful! Each page is double sided, and has a decorative edge where the bar code lives.

- The other paper on the layout is Hambly (blue lace) and Basic Grey (grey spiders). Both of these are from new lines from each company. The Basic Grey halloween line is great...lots of neutral grey, black & ivory, with some punches of colour throughout. And the embellishments are fun as well. The Hambly lace paper comes in a bunch of colours and there are overlays to match. Other patterns include snowflakes, leaves, swirls and dress forms.
This layout is about how I had a really cool costume for Halloween but didn't actually get a real picture of myself wearing it! I went as the Nursery Rhyme Hickory Dickory Dock...I had a painted clock face and a handmade stuffed mouse on my vest. It was very clever, if I do say so myself. I'm going to add some journaling, once I figure out where it can go, and call it a day!


See you back next week...maybe I'll have an actual technique for you! If I can get my hands on some metal tools, I'm going to do a little 10 Second Studio project!

I have a couple of fun classes coming up, if you're interested in learning first hand some of the rad techniques I feature here. Altered Canvas runs on Tuesday, November 17th from 6-9pm. We'll be painting, using gel medium and gesso, Glimmer Mist and creating a cute collage for your house! The first time this class ran, it was a lot of fun!

Unleash Your Inner Artist runs next Saturday, the 14th from 10am to 1pm. This is the one I'm really looking forward to! We will be playing with paint, Glimmer Mist, colour washes, masks and stamps to create a whole bunch of fun and artistic backgrounds for future layouts or paper crafting projects! It is going to be a free form, go at your own pace class, and I hope every body becomes a little more adventurous in their scrapbooking and crafting afterwards.

To sign up for any classes, to reserve one of my rad new kits, or just to chat, give the store a ring: (780) 414-1540.

later skater alligator

Thursday, November 5, 2009

the new kits are here! the new kits are here!!

This month we have three kits again, put together by K.C., Victoria and myself. And they are so lovely! And there are still some in stock...hoorah!

I've already finished a bunch of layouts with my kit, and K.C. has for sure started on hers, I have the pictures to prove it!

So I'm going to post some here for a little inspiration...have fun!

Lisa's Kit: The Sky's the Limit


K.C.'s Kit, Yellow Brick Road


There are "ingredient" lists on the main TM blog, along with lovely pictures of all the contents of each kit. Call the store to have one put aside for you, or we can ship one or two or all three to you, anywhere you want! WOW...now that's service! Unfortunately, we draw the line at doing the layouts for you! HA!

Regularly scheduled programming will be back tomorrow...I've already completed my TOTW layout! That's crazy! It's nothing special this week, but hopefully it will whet your tastebuds for yummy things to come!

later skater alligator

Friday, October 30, 2009

Halloween Project

My last Halloween project this year...maybe! I have an entire day tomorrow to make more little crafts!

It's a little "plaque" that I'm hanging on my door. I have a similar one that I made for Christmas...all with ink and paint and paper! It really puts me in the mood for the holiday, and now I know I will have a great craft to pull out next year as well. I'm using supplies that I already had in my stash, adding some paints and ink and lots of imagination!

You will need:
- piece of corrugated cardboard cut to size
- pattern paper, ripped into different sizes
- paint, ink, stamps, glimmer mist, etc.
- other Halloweenie embellishments...skeletons, pumpkins, black cats, bats, etc.

Start by gluing down pieces of pattern paper. I use gel medium, but you can use decoupage medium or white glue just as well.

Now, smear some coloured paints on top, one colour at a time. Then smudge them together using a wet paper towel or baby wipe.

Add some black or dark brown to pick up the texture of the cardboard. Using a dry brush technique works well for this, so you don't get too much paint, but enough to add some contrast.

Embellish...I'm using Riff Raff Designs chipboard bats and the word "Spooky", as well as some American Crafts black brads, Art Chix skeleton die cut, 7Gypsies mini door knob, Making Memories word stickers, and some random feathers.


On the bats I first applied black crackle paint, then once it had dried I sprayed it with a couple of colours of Glimmer Mist.


The word "Spooky" is painted with black crackle paint. You could emboss your shapes, or paint then add some Glossy Accents to really make them stand out.


And since I love love love dangle-y things, I added some keys and other random metal embellishments to a chain along the bottom of my canvas. Whenever I open my front door, it makes clanking noises...and with a little imagination they become spooky, ghostly chains of the ghouls trying to escape the underworld and give us a little haunting on Halloween!

Punch two holes in the top and string some tulle through. I tied a simple knot through the hole, then attached the other end of the tulle to a twig and hung it all on a push pin that remains in my door permanently for crafts like this!

enjoy! I'm going to try and be back this weekend with a Technique post using some of the new wonderful Hambly that has just started hitting stores. Until then, Happy Haunting!

Friday, October 23, 2009

good afternooon good evening and good night...

The Technique of the Week today is a little something I "scraplifted" - that is, stole - from a super good friend of mine the Lovely Nadine. Nadine is always cooking up some lovely technique or album or card or decor thing on her blog Delite Designs, for the Riff Raff Design Team and for a class or two at Treasured Memories.

She created this lovely for the last Riff Raff release...which you can check out here...but for now, you're stuck with my interpretation of it! Putting a glossy surface on the chipboard first allows you to apply the alcohol inks, mix them up and play around without having them soak immediately into the surface of the chipboard and lose their natural, colourful beauty. Nadine is just clever that way I guess!

You will need:
- Crackle accents...Nadine used clear embossing powder instead, which totally works just as well and I have to give her props on that one because this is her technique and all!!
- A couple different colours of alcohol ink...I'm using Stream, Butterscotch and some other kind of yellow.
- Chipboard shape...I'm using the new "Thankful" from Riff Raff Designs

Step One: Cover your chipboard shape with crackle accents OR if you're doing it Nadine's way, stamp clear ink all over your shape, sprinkle clear embossing powder all over, then emboss it.
You'll have to let the crackle accents dry, which takes just 5 minutes short of forever. If you do it Nadine's way, it takes less time because you just have to wait for the shape to cool off. I myself am lazy and didn't feel like getting out all the tools required to emboss a shape, so I did it the slow, yet less complicated way. But remember my infamous advice: use what you got!


Picture #1: Just a smidge of crackle accents.
Picture #2: Covered in crackle accents...ooh la la! I can never be accused of not being thorough!


Step Two: You can apply your alcohol ink in a variety of ways. I used makeup foamies to smudge it around on the crackle accents, but you could use the felt applicators that Ranger makes to apply their alcohol ink, or you could use a Q-Tip...what does it matter to me?


Look at my messy fingers! You don't have to get messy while doing this technique, but usually the mess just finds me and since I don't mind, it doesn't matter. I'm still covered in paint from my creating session two days ago! Not for lack of showering!


Step Three: There is no step three. This is really a two-step technique...it just doesn't get any simpler than this. Let everything dry up nice and good, which doesn't take very long for the alcohol inks, and stick the finished shape on to your finished layout...like this!


And what's a post from Lisa without at least one crooked photo?


Enjoy, and make sure to stop by Nadine's blog and say hi! And thanks!


later skater alligator

Friday, October 16, 2009

Project #2...this week!

This project is inspired by Elsie...you might know her as ElsieCake or from the line of scrapbooking products as Love Elsie or when she wrote that book, or won that big contest, etc. etc. I yoinked the idea from this blog post showing how to make a banner out of instant pictures. Well, I don't have instant film, or an instant camera, but I have lots and lots of pattern paper.

This is a super cute idea that, like most of the projects on here, can be changed to suit your mood, decor, theme or whatever! Just change up the papers and the word or words. It's cheap and eco-friendly because you're using up scraps, and it's super fun and wonderful! I love autumn, so I decided to make my banner to match some of my fall decor that I put up in my home recently.

Enjoy!

******

You will need:
- six different pattern papers, or however many you need for your word of choice...you'll need a different colour for each letter...I chose ones that were heavier weight so they would hold together better once I started cutting them.
- pen and scissors or craft knife
- wooden clothespins (small or large)
- wool, ribbon, string
-tape, nails, hooks (something to attach it to your wall)


Step One : Cut all your papers down to the size you want...mine are all 3.5x5. Lay your papers out in the order you want them. This might take some moving papers around until you get it looking good!

Step Two: Draw (and I mean freehand!) your letters on each piece of paper. They don't have to be perfect or anything. If you're really not keen on your drawing abilities, run them through the computer, BUT REMEMBER to use a really simple, block font or else you will have a heck of time cutting the letters out!


Step Three: Cut out the letters using scissors or a craft knife. Your letters don't have to be perfect...mine looked pretty rough once I cut them out, but on the wall you can't even tell!

Keep cutting out your letters...

Step Four: To attach my banner to my wall I am using masking tape and a piece of ivory wool. Masking tape because I don't need any more holes in my walls! And wool because it reminds me more of autumn and I have buckets of this around the house so I can afford to use it on silly projects like this one! You can guess on the length of string you'll need...but better to guess too long and have to cut some off, then guess too short and have to cut another piece!

Step Five: Hang letters with clothespins. Since there's no gluing letters down, you can move them around if you got the spacing wrong the first time. And you can leave the wool up and change the word whenever it pleases you.


My Autumn-Fall-Halloween Inspired Decor. The mantle is the only place in my house I ever really decorate for the holidays, so I go all out! And you can see my little Trick or Treaters there as well.


Hope you had as much fun with this as I did! It would also be great for a baby or wedding shower, or a birthday party with the guest of honor's name. I'm not big on Christmas decorations, but I can see a "joy" or "believe" or "jolly" hanging up there in a couple of month's time.
Thanks for stopping by...