Friday, February 26, 2010

Postcard Part 3

This is the last postcards technique this week, and my last post until March 13th! I will be working on the new blog...ooh la la!

You will need:
- a bunch of postcards from the same location, or same trip
- Gaffer tape, paper tape, hockey tape (yes!), masking tape, packing tape
- embellishments to finish your layout

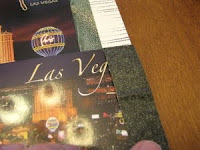
Step One: Assemble your postcards. I am doing this layout on our trip to Vegas last summer, so I pulled all my Vegas postcards to choose from.

Step Two: Choose three postcards from your giant pile that you are going to use. I picked three that I like the most and said the most about my trip. We stayed at the Luxor, and I the Paris Hotel & Bellagio fountains were my favourites. You can now choose paper and embellishments to "match" these postcards. See my note about that at the bottom!

Step Three: Decide how your postcards will be layered. Think about what you want to see first thing, then layer the postcards from there. Think about which way you want them to fold and flip - up, down, left, right - and make sure there is enough room for tape in between them and along the edges. Here is my order starting from the bottom:

Step Four: Pick a non-postcard image to layer on top. This gives a place for your title, unless you want to use the words on one of the postcards for that. It also provides a little rest for your eye from all the busy-ness of the postcards below. I chose this packaging from an American Crafts buttons set. And since it had product description on the back, I covered it with some lined paper from Sassafras.


Just trace the shape and then cut out. Then glue it on the back. Same goes if you choose pattern paper or something else to adorn the top of your layout.

Step Five: Now we start taping. Grab your tape of choice - mine is the new 7Gypsies Paper tape. It comes in some fun colours and patterns and is really easy to use!


Start with the paper or postcard that is on the top layer. For me, that is my American Crafts packaging. Measure your tape so it is no longer than your paper/postcard. It can be shorter, just not longer...once you flip your postcard you will have a sticky tape end sticking out, and nobody wants that!


Mark the tape where you want to cut it (see the black arrow in the photo). Cut your tape. Then peel off the backing.

Stick the tape onto your paper/postcard and the background paper. Line up the paper/postcard so it's as straight as you can get it...you could use a ruler or measuring thingy, but I prefer to "eyeball it"


Once you get the tape down, fold open your postcard and press down along the crease. This will help the postcard fold better, and make sure the tape is nice and secure.

Now tape down the next layer. For this postcard I had some text that was right along the edge, and I didn't want it to be covered. So...I just mark my cut below the title.

Remember, that your tape can be shorter than the edge of your postcard, just not longer.

As you go along, keep closing the top layers to see where you're at. The postcards and paper can shift around and you want to make sure they all get into the right place. This also helps make sure you won't get stuck on the last layer and not have enough room for the last postcard!

Here are all my postcard layers after they've been taped down, but before I did any embellishing.

Embellish
When you pick embellishments for this layout, keep in mind that anything you add below a layer will add more depth, so you don't want any embellishments that have a lot of height to them. Rub ons and stickers are great to use inside your layers. And they come in lots of fun colours and shapes and sizes, so that you can't go wrong with whatever theme you are working on.

I chose Hambly lime green lace rub ons, and black American Crafts stickers. With some shiny stars to compliment the shiny lights of Vegas!

Here are some pictures of each finished layer, starting from the bottom. And of course Blogger picks now to rotate some of my pictures again...hoorah...


And the very front. I kept it simple and let the postcards be my title. You can see I carried some of the lace rubon detail between layers. 

The background is made using a Prima Background stamp and some "black" ink. Just ink and stamp...all over. It's best on this layout to use a simple background...plain cardstock or a really simple pattern work best. Otherwise it gets too busy.


Lisa's Extra Special Note: Regarding "Themed" Layouts
I know a lot of scrapbookers out there love to use themed products on their themed layouts. But I am here to tell you that it doesn't always have to be that way! We had a customer at our crop last week who was working on her Vegas pictures and she was really disappointed that we didn't have any Vegas embellishments for her to use.

From my point of view, most Vegas embellishments are "tacky" and are never the right colours for my layouts. And don't represent what I think of when I think "Vegas". But you can't tell a customer that...you have to help them find other options that might work for them! She went back and looked through her photos and was struck by how much yellow was in them...from all the bright lights. So she found some fun yellow embellishments to accentuate her layouts! YAY!

So if you want to scrapbook some farm pictures, you don't always need a red barn or a cow sticker...sometimes a nice leaf or flower in the right colour, with some gingham ribbon will do the trick! I scrapbooked a whole whack load of my Vegas photos without a Vegas-themed sticker in sight...and I love them all!

*****

So this is my last post for awhile. I will be back in two weeks on the new Blog. I'll put the link up here so you can find me there! I'm very excited! I haven't really customized this Blog since Juli and I first did it up. The new one will have all these "old" techniques for you to look through, as well as other interesting links and places to check out on your Internet Travels.

Until then...Happy Creating!!

Postcards Part 2

This is a super simple way to add a postcard to a page...as a journaling spot!

You can always buy some postcard looking die cuts - I have some from Making Memories - but it's also fun to use a real postcard instead.

You will  need:
- a postcard with a simple back
- a pen to write with

Step One: pick your postcard. We want one with not a lot of "stuff" on the back. All postcards have a little blurb about the photo on the front. Make sure yours has as little blurb as possible! I'm using on from Making Memories...it's not a real postcard this time!


Step Two: Write on your postcard. Journal as if you were telling someone about your trip. The highlights, the lowlights, who you traveled with, etc. Whatever interests you about your trip will be interesting to your audience!


Step Three: Stick it down! And finish your layout!


Optional:
You could use it as a space to write some hidden journaling, and tuck it behind a photo or piece of paper. Sometimes I find that my page fills up quickly with photos, papers and other design elements. And since journaling often gets left to the last moment, I find I don't have any room for it! Creating hidden journaling still allows for you to add some verbal detail to your layout, but keep the original design in tack! Woo Hoo!


You could also try:
-While you're away, pick up a couple of cheap postcards from the local souvenir shop and "journal" on them. Write about where you are, and what you've been up to. Then buy some stamps and send them to yourself at home! When you get home you'll have some fun mail and the perfect addition to your scrapbook layouts for that trip!
- Remember that postcards as journaling spots don't always have to go on travel layouts. The layout I completed above is for a birthday party that Lucas attended. We didn't leave the country...heck we didn't even leave our street...but we went somewhere and it was a big deal for Lucas, so I thought it was the perfect fit!

Pop back later for my fold-out layout using postcards. I just need to print some photos and take some pictures of the final product and then post! It's so much fun to create a layered layout like this...I can't wait to share!!

Until then...

Wednesday, February 24, 2010

Projects Using Postcards

I love shopping at Value Village. And best of all, I love buying the "Housewares Bags" because they are always full of fun goodies at a great price! One day, on my regularly scheduled tour of the store, I came across a Housewares Bag full of vintage postcards. From Italy, and Paris, and Madrid, and Heidelberg. There were books of them and loose ones. There were places I recognized, and places that were new to me. They were all beautiful!

So I decided to buy them...duh...and do up a couple of projects for you!

Project #1: Mini Album
You will need:
- a bunch of postcards for the same location
- "matching" pattern paper, the cardstock weighted kind
- packing tape
- simple embellishments, rub-ons, sticker letters

First things first, figure out which postcards you are going to use, and how many pages you want your album to be.

Now measure your postcards. Mine were 4 x 5, or something like that. Once measured, I cut all my patterned paper down to size. If you are using double-sided paper, you only need to cut
one paper for every postcard. If you aren't using double-sided, or hate the other side of your paper (that was my case) you will need to cut two pieces for every postcard. We will glue the backs of the pattern paper together later.

Throughout my album I alternated postcards and pattern paper:
Title (pattern) - postcard - pattern (2) - postcard - pattern (2) - postcard...etc. I used a total of four postcards and 9 pieces of pattern paper. Eight of those pieces are glued back-to-back. The last page I left as is. I wanted to have a lot of space for journaling, as that is the whole point of my album - no photos except for the postcard. So I used the back of each postcard, plus the opposing pattern for journaling. The pattern opposing each postcard is for a sub-title of the location pictured in the postcard. Wow, this sounds really complicated! But I promise it actually isn't, once you get going!!

Once you have cut all your pattern paper, lay out your album in order, choosing which patterns will go where.

Now, glue your pattern papers back-to-back...if you're going that route.

Now to assemble our book. I do this before the embellishing because it's much easier!

Grab your packing tape. This stuff is great for making a mini-album because it's flexible, sturdy and clear so you can see your postcards and pattern paper through the tape. I love gaffer tape, but sometimes the dark line along each page can be distracting.

Starting with the first page, line up your paper to the packing tape, and make sure about half of the tape is over the paper. Press the tape down. Don't cut your tape at this point! I added the black outline so you could see where the tape is...sorry for the screwy photo!

Use the roll of packing tape as a guide and a solid surface to help you place the opposing sheet of paper or postcard. Line up the edge of the next sheet with the first sheet, using the roll as guide for where the bottom goes. Press the tape down.

Now you can cut off the tape. And you have two pieces of your album! The packing tape is practically invisible! And it's so easy - and cheap - to use for this! Note: Blogger has decided to flip some of my photos, and there's apparently nothing I can do about it...sorry!

Keep adding pages into your book, using this method. Below you can see what the back of the postcard looks like. Thanks to the packing tape method, you can add as many pages as you like! Just keep sticking each page together like we did in the note above.

You can see in this picture how I alternated pattern paper and postcards.


The finished book:


This last picture shows what the pages look like with my journaling added. I kept the decoration of the book very simple. I didn't want the finished product to be too thick and I also didn't want to have to purchase a lot of stuff. This mini book will serve as a keepsake for my current memories of my trip to Italy when I was in junior high school. Most of the photos I have from the trip have already been scrapbooked - badly - so I didn't want to start all over again with a big book.

This is a great way to capture the special memories of a special trip without having to pull out all the stops and create a deluxe album! But you can totally still do that!!

You could try:
- use postcards from lots of different places you have visited
- making an accordion folded book instead of a traditional album
- do this "on the go" while you're on your vacation! All you need is some scissors, packing tape and a pen to document your memories as they happen

There are so many possibilities when it comes to using postcards on projects!
Check back Friday for two layouts using postcards. First, a simple way to add a journaling spot. Then an amazing fold-out layout to accommodate lots of journaling and photos! I'd leave you with a sneak peek, but I don't have photos yet!

Friday, February 19, 2010

Kitschy Digitals & Goods...mostly goods!

So here is part two of my Kitschy Digitals post. I bought some of their paper goods about a month back and fell in love! The feathers look like real feathers, and the frames have such great texture and personality! I just knew I had to share them with my readers!

I bought the feathers, the yarn flowers and the woodgrain/vintage frames from here. The price is great, and the  shipping not so bad either. And it didn't take long to come. And they didn't get all banged up in the mail...I hate when that happens!
Everything is printed on thick cardstock, with quality ink, so no worries there.

So now, you just cut your stuff out.

And do your thing...

BONUS TECHNIQUE: covering up an ugly corner. My hubby didn't take a lot of pictures at my sister's wedding last month. And some of the ones I have aren't the best. But I really like this one of me walking down the "aisle". It felt like I had a mile to walk and this kind of gives you an idea of that. Unfortunately, you can see the DJ set up, and an ugly red chair. But if I crop the photo down, it just isn't the same.
So I covered it up with some pretty feathers and chipboard and a flower! You can still see most of the frame, but now you can't see the chair or table. Try this the next time you have a "trouble photo" instead of pulling out the scissors.

The big frame goes nicely around my wallet print, and the smaller frame provides a little extra embellishment at the top.
The background was created using lots of Glimmer Mist over top of a Jenni Bowlin chipboard shape. Then I removed the shape.

On this next layout I'm using the yarn flowers. I vaguely remember making these when I was a young'un with those little plastic looms! It's hard to believe that this is a one-dimensional shape printed on paper! You can actually see the shadow of the yarn! I have a hard time with most digital stuff because it looks fake...you can tell right away that it's a digital image. But this stuff is so real looking!

I even used the little doll that comes on the package. Danielle really loves Blythe dolls, so they are sort of her "logo". The package that my papers came in had a trio of dolls printed on the face. So I cut out the most Lisa-looking one and stuck her down. The jewel on her shirt is Prima.

the complete layout:

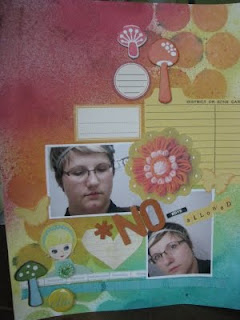
Just some fun pictures I took around Halloween. The "Boys" sign on my door is an actual bathroom sign from a school that was razed by my grandma's old place. Me and my sister dug through the rubble and I found this gem! It works well as part of my title!

It's really fun to use digital and regular embellishments together on the same layout. The combination of flat and puffy is really fun, and the extra colour and texture never hurt nobody!

I hope you enjoyed the "Technique" this week! I had a lot of fun playing with my Kitschy Digitals & Goods.

I totally recommend checking out some digital or hybrid scrapbooking products. Sometimes you can find things that just don't exist in a traditional scrapbooking store. And the fact that you get a file to keep on your computer and use forever and ever...hey I love that! And a lot of stuff out there now can be altered - colour, size, texture - if you have the right software. If you're new to digital scrapbooking, most sites that sell the stuff have classes or tutorials you can use to practice and become more familiar with the products.

And I am so not comfortable scrapbooking on the computer, but this felt like traditional scrapbooking, with a new technique and that's that!

next week: Projects with Postcards...I'm so excited!! see you then!