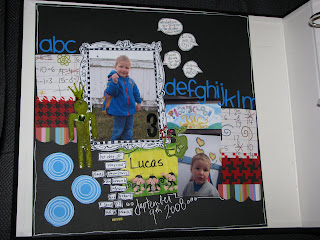
This may look complicated, but if you take it one step at a time and don't put too much pressure on yourself, it turns out great every time! I use this technique a lot, as it adds a bit of interest to my layout and never looks the same as the last one I did!
Step One: Draw your inside rectangle (or square). If I know I am going to put a certain size photo inside the frame, I make my rectangle the same size. And totally feel free to TRACE the shape at this stage Once you go over it in pen a couple of times it will look like you doodled it!
Step Two: You can add some interest to the inside shape if you want. I added a second line and some dark stripes.
Step Three: Draw your corners and middle first. This way you can just "connect the dots" with the rest of the outline of your frame. I always do three little bumps, but you can try doing just one bump or leave your corners square.
Step Four: Now, connect your corners and middles with a line. At this point, you can go back over your previous lines. The more lines you add on top of one another, the more "doodly" it looks! This also hides "mistakes" really well. But remember, doodles aren't meant to look perfect! So have fun, and don't worry about making everything symmetrical or the same size. It's supposed to be whimsical...that's the whole point!!
Step Five: Fill in your frame. I usually just do swirls or squiggles, and I really fill it in!! But you can leave it a little emptier if you like. Start with just a few lines, then add more as you go until you get the look you want. You can always add more lines, but you can't take them away! If you're hesitant about jumping in feet first and using a PEN on your first try, don't! You can use a pencil to give yourself a rough idea of your pattern, then go over it in marker after you like what you see! And I always tell my students, that like everything else, practice makes perfect! I keep a little journal to sketch out layout ideas and I also use it to practice my doodles.
And here is a layout I completed using my freshly doodled frame! You could also use it as a journaling spot, or as a place to put your title.
Try adding colour to your next frame: either by colouring or painting inside the frame, or doodling in a colour to match your layout.
And we do have a Doodle class scheduled for October (or November...I can't remember offhand!!) so keep checking the main TM Blog and the Classes Blog for more information on dates and times! We'll probably be posting that schedule near the end of September.


No comments:
Post a Comment