You will need:
- new Heidi Swapp Invisibles paper
- Tattered Angels Glimmer Mist in a variety of coordinating colours
- a wet paper towel or baby wipes (to wipe off the excess Glimmer Mist)
- newspaper or cardboard to protect your work surface
Step One: Lay down some newspaper, old paper bags or cardboard on top of your work surface. Glimmer Mist tends to get a bit messy...in fact I had a dream the other night that I had been spritzing Glimmer Mist to my heart's content against one wall at the store, only to move some furniture and discover a giant smear of pink all down the wall! Not that this could happen in real life, but you get the picture!!
Invisibles are cool because they are pretty much just a white sheet of paper with a pattern embossed on to the surface. This creates a slick surface that resists whatever ink or paint you decide to throw at it!

Step Two: Spray your lightest colour first (mine is yellow) and cover the entire background. After yellow came orange for me, and I made sure to leave lots of yellow showing.
 When you've finished spraying one colour, wipe the excess Glimmer Mist off the shiny parts on the paper. That way the "Invisible" part will stay nice and white through all the applications of Glimmer Mist. TIP: Do not use tissue to wipe off the excess Glimmer Mist as I did...it will just leave little pieces of tissue all over your paper! Instead, try wet paper towel or baby wipes!
 Here's the paper after the yellow and orange have been applied.
Keep adding colours until you like what you see!

Close up: this is still wet, but you'll notice that I have some dark and light areas that create a really beautiful background full of depth and life.

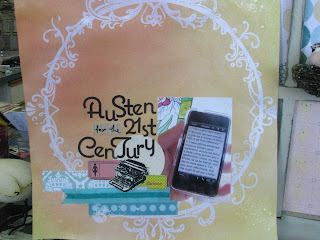
And the finished layout:


The possibilities for this stuff are endless...Heidi has come out with a bunch of different patterns of Invisible papers, as well as pattern chipboard and letters. It really is too awesome - customizable everything!!
Happy Creating!


1 comment:
Gorgeous, i just got some and now I cant wait to use them
Post a Comment