This week I'm going to show you four ways to bring the sparkle of the season into your scrapbooking layout!!
You will need:
- Tattered Angels Glimmer Mist in a colour of your choice - I used Daffodil for this project
- Tattered Angels Glimmer Screen - or some other mask
- Variety of colours of rhinestones/gems/bling. I used Doodlebug red and brown, and Kaiser Crafts peach
- Prima rhinestone swirls
- Buttons
- A chipboard shape - I used Riff Raff Designs hand
- Glitter - I used Melissa Frances, which comes in a pack of three colours, but any glitter will do. We also carry Stix2 & Doodlebug brands, but I've heard that the Martha Stewart stuff is amazing!!
- Stickles in a variety of colours to match your layout
I think I've covered this Techneek before, but here's a little refresher!
Grab the Glimmer Mist you chose for your layout, and a Glimmer Screen or mask.
Lay the mask down on your layout and spritz the Glimmer Mist all over it, and around it, BUT don't cover the whole page with Glimmer Mist. Carefully move the screen to another part of the layout and spritz with Glimmer Mist.
You could also try:
- Adding a second accent colour around the edges. Do the base colour (a light colour or a neutral like silver or gold), wash off the Screen, then reapply it in the same place and spritz with a new colour!
Techneek #2: Rhinestones
Start off by pulling together a whole bunch of rhinestones/bling from your stash that might work on your layout. You can pick and choose from this pile once you start putting your layout together. I chose browns, reds and golds that went with photos I had in mind.

Pull together some pattern papers for your stash that match your layout and the rhinestones you picked. They don't have to be a perfect match, just similar in tone.

Now punch out one square per pattern paper. Try and find a unique pattern within the pattern that will look good in a little square! Make sure you have enough to run down the entire page, with a little space in between.
Arrange your punched out squares, and adhere to your layout. Notice how they are a little crooked...you don't need your ruler for this part!
Now take your pile of assembled rhinestones/bling, and add some to the squares. Think of each square as a mini layout. Don't be afraid to add words, buttons, brads, rub-ons, etc. to add some sparkle and interest to this side of the page, as the other side will remain fairly unadorned. You don't need to decorate every square!
Finally, to unite all the elements on the page - the black in the paper and in the photos, the bright red of the lights, and the bling - I added a Heidi Swapp clear title block, a Creative Cafe felt word, and a beautiful Prima bling swirl. These guys are super easy to use, as all of the rhinestones are stuck to each other with a practically invisible plastic piece, so you don't need to glue on each rhinestone individually! This finished off the page nicely, and makes my title stand out.
And the finished layout...all I need to do is add some journaling, and I'm ready to put it in my album!
There are so many ways to add rhinestones to your page. If you remember last week's Techneek, I used some to add sparkle and dimension to my Button Border. They also look great in the centre of a flower, or on top of a large brad.
Techneek #3: Glitter
Choose for yourself a nice chipboard shape, and some glitter. You should also lay a sheet of scrap paper down on your work surface to collect the glitter so it doesn't get all over the place.

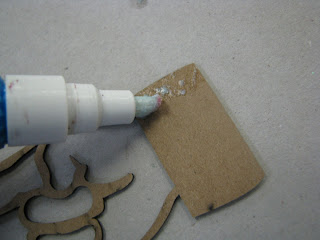
I like using the ZIG Two-Way glue pen for glitter (and flocking) projects. It adds just enough glue, and since it doesn't dry immediately you have some working time. Start in one corner of the shape and add glue to a small area.

Then sprinkle your glitter over top of the glue. Tap off the excess, and start on the next patch. Add your glue, then sprinkle on your glitter.
Keep going until you have covered the entire shape with glitter. Look how pretty!!
And here is the layout I built my hand shape around. I really wanted the hand to stand out on the page, and what better way to do it than with a little sparkle! It also bring attention to the red in the photo and reminds me of marquee signs, which is reminiscent of the theme of the layout!
You could also try:
- Adding some glitter to a clear shape. The liquid glue dries clear, and if you use white glitter you get a really whimsical effect.
- Create your own design on your background using PVA glue. Stix2 PVA glue has a nice metal tip so you could do an intricate swirl, add some glitter and have a beautiful hand-made background!
- Using some of the *new* Swarovski Crystals we just got in! Boy do these guys SPARKLE!!


1 comment:
Love this one!!!
Post a Comment