Wednesday, February 3, 2010

Ten Second Studios

I can't believe I forgot to post this last week...I'm so forgetful sometimes!!

I must say, that this stuff was hard for me to work with. I don't know if it was because I didn't seek proper instruction beforehand as to what tools served what purpose, or something else. And while it was a complete failure, it wasn't a complete success either!

You will need:
- coloured metal sheets
- a shape to emboss (or embossing template)
- tools (I'm using the brayer and sanding thingy)

Step One: Lay your metal over top of the image you want to emboss. I'm using a Riff Raff Chipboard shape because I didn't have any of the embossing plates at home.

Step Two: Brayer over the entire image. Make sure you get in all the cracks and seams, so the image is "transfered" to the metal fully. If your image has a lot of small detail, there are other tools that will emboss it better than the brayer.
Step three: Once the shape is there, you can start sanding the surface colour off to show the raw metal underneath.
Like this!
Here you can see the Riff Raff shape next to the finished metal action.
I tried some of the other rolling tools to create texture. Use them on the back of the metal then sand the top for the "best" results.

Note: Alcohol ink will take the colour off your coloured metal. So if you want to use alcohol inks, buy the uncoloured metal sheets.

I recommend: Buying the video! Or going to their helpful website. There are lots of videos there, that I probably should have watched before I attempted anything! They will be more helpful than this post...sorry for wasting your time! (TEE HEE!)

K.C. is running a fabulous class this weekend, using all of this stuff...check it out!

Thanks to my assistance Lucas for holding some tools while I took pictures. He had a lot of fun with this technique!

I promise to have something better for you this week...and I'm going to work on it today so I don't forget again!!

Wednesday, January 20, 2010

Where have I been?

I know I promised to be back sooner with the second layout...but time snowballed away from me, and all of a sudden the weekend was over and now it's Wednesday!

For this layout I am using the text paper from the Jenni Bowlin embossed paper line. This sheet is black with a beige core.

I first laid out the papers and embellishments I wanted to use on my layout, so I would have an idea where I wanted to sand the paper. I took a picture of this so I could go back and check it out while I was sanding! It doesn't have to be exact, but it will give you a better idea where things will be when you're done.


I started by sanding all of the edges. Then I sanded bits of the rest of the paper. I wanted most of the focus to stay on the right side of the layout, so I left most of the left side untouched.
Here's a close up of how it looks. I really love the text!

The almost-finished layout...I need to print a photo, this one is just a stand in! The black background really allows the photo and embellishments stand out, but without being a boring black...it has some interest as well!
You could also try:
- sanding certain words that accent the theme of your layout (for example, you can see near the bottom I gave extra attention to the phrase "you must remember")
- sand the entire page, but leave some areas lighter than others
- use bits of the paper as an embellishment...this would be especially neat if you covered a chipboard piece with it!

I hope you enjoyed layout #2 in this Technique. This week I want to finally tackle the 10 Second Studios metal...so wish me luck and meet me back here on Friday!

later skater alligator

Friday, January 15, 2010

Jenni Bowlin & Embossed Papers


For the Technique this week, I yoinked a couple of pieces of paper from K.C's new Jenni Bowlin paper pack! It is an excellent little pack of paper, I tell you what!

This is patterned, embossed paper, that has a different colour core than the surface colour. It is so wonderful! And it comes in some of her best patterns. Here is a link for some more pictures: "link".

You will need:
- embossed paper
- sandpaper

I apologize now for all the sideways pictures. It's just not my day!

This is what the (ivory) paper looks to start. You can only sort of see the embossed image on the paper. I'm going to show you this technique on two different sheets of the paper, because the ivory does not photograph well, at all! Check back later for the second layout.

You'll want to take a small piece of sand paper, or a sanding block or file to the embossed areas. Remember that the core of the paper is a different colour (in this case, lighter ivory...sigh) so you will start to see the different colour underneath. Keep sanding until you are satisfied with the colour coming through.

And this is the ivory paper after it has been sanded. Kind of looks the same doesn't it? That's why I'm going to show this on another sheet of paper. Be patient!

And here is my (first) finished layout. I used some other Jenni Bowlin paper and embellishments to finish off this layout about my sister and her hubby.
The ivory/light ivory paper has a very very subtle effect (very...subtle), so you might want to try inking it, if you want the pattern to show through more. You could try a fancy colour to brighten things up. I actually kind of like the subtle edging on this layout now that I'm looking at it!

Check back later tonight, when I hope to have the next layout up for you. After my fingers warm up, and hopefully Blogger stops acting up!

later skater alligator

Friday, January 8, 2010

Miss Me?

I missed you!

I hope everyone had an amazing holiday break and are now ready to get back to work!! HA!

I have been thinking a lot about what I want for myself in this new year, and I have a lot of creative goals...one of them being keeping up with my Techniques Blog! So I have spent the last week brainstorming away all the new and fabulous things I can pass along to you!

I am going to start simple this week. Using something all of us have loads and loads of sitting in our stash. In fact, I may have done this technique before - or something similar - because it is just so darn great.

You will need:
- a pencil
- a whole bunch of brads, any shape or size, all coordinated with your layout
- a paper piercer, hole punch, scissors, etc. to make a hole for your brad


Step One: Draw a line on your page where you want your line of brads to go. You might want to lay out your layout before you do this, so you know where you want the brads to go. And we use the pencil because we can erase it if we don't like our first try! Or our third, or fourth...
Step Two: Choose some brads from your stash that will go well with your layout, and start laying them out on your line so you get an idea of size and colour placement. Again, this isn't the final step, so feel free to play around with placement until you get something you like. You can change your mind right up until you punch the hole!
Step Three: Start on one end of your line, and punch a hole for the first brad. I marked my hole with a pencil before I punched it, so I got it just in the right place. Lay your brad over top of the pencil line, eyeball where the centre is, then mark it with a dot. Now make that hole!!
Step Four: Keep going, one brad at a time until you reach the end. I wouldn't recommend going at it from each sides and then meeting somewhere in the middle. Because then you need to make sure you've got a brad that fits in whatever hole is left! Better you just shorten or lengthen the line based on where you end up.

This is what the back will look like. It helps everything lay flat if you keep the prongs all going the same direction and not crossing over each other.
The finished layout...I like how my line of brads acts like an arrow, directing the reader from the photos down to the title. Notice how my final line of brads does not match my original sketch. It turns out that the little "loop" I drew didn't really work, so I just erased it and kept going.

The downside to this technique is that your page will be very heavy and large! If you want the same effect, but like to keep things light and slim, use paper or stickers instead. You can punch circles from pattern paper, or any shape really, and accent them with stickers or rub ons. The effect will be the same, but your page won't be so bulky!

I'm planning a whole bunch of classes in the next couple of months. Keep your eye on the TM Classes Blog for more information. Two of theme will feature Techniques I have done here in the past, so it will give all of you, my loyal readers a chance to try this stuff out in person!!

Until next week...

Friday, December 11, 2009

TOTW - Yarn Sweet Yarn

Don't you just love to snuggle up in a warm blanket this time of year? With a pair of cozy slippers and a hot cup of tea? I know I love it...and you're probably wondering where I'm going with this!? Well, when I think "warm and cozy" I think of yarn &, wool. There's something so comforting about a knitted sweater or a homemade afghan blanket. And while I am not a knitter (I can cast on, knit and purl, but not in a straight line and I drop as many stitches as I make), I sure do appreciate a bright skein of wool!


So my technique this week is using wool on a scrapbook layout! It was easier than you might expect.

On this first example I braided three strands of wool to use as an embellishment on my layout. Here's a tip to make it a little easier to braid the strands without them winding back on each other. Tie the three strands in a know, then pin a safety pin through the knot and into something sturdy and close by, like the ball of yarn or your pant leg.


Or you could always stick something heavy on top of it...like a coffee mug!

Since I was using very long pieces of yarn for this project, I tried to keep the ends in a bunch so they wouldn't get all tangled up together as I braided.
I used liquid glue and staples to attach my little braid to my layout. Play around with the placement of the braid before you glue it down, and you could put a little curl into it!


In this second example, I thread the yarn right through my paper!

First, pull out your Crop-A-Dile or Big Bite and punch some holes. I just eyeballed where they would go, but you could mark them first with a pencil.

The Big Bite is nice because you can reach in to all areas of your layout. If you don't have a Big Bite, you can use a paper piercer or one of those old-school hammer powered hole punches. You just need to make sure your holes are big enough to fit a giant strand of yarn through!

Then coming up from underneath, start threading your yarn through the holes. You can tape down that loose end...or you could start from the top and tie a knot for a little extra flair.
Keep going until you've reached your last hole. Finish underneath and tape that loose end down as well.
Shazam!


Take it a step farther and use different kind of textiles on your layout, like leftover fabric from a sewing or quilting project, ribbon or lace, felt or felted wool. You could also carry the theme into other embellishments and use buttons, zippers, pins or any other sewing notions.

Enjoy...and try to stay warm out there! I'm so looking forward to the high of -30 we're getting today! Yippee!

Friday, November 27, 2009

A Technique & A Shameless Plug!

I have a lot of sticker letters. A. LOT. But sometimes, I just don't have the right colour, or more importantly, I don't have enough of the right colour. This tutorial will give you a tip or two on customizing the colour of your finished chipboard letters.

You will need:

- white (or another light colour) chipboard or paper sticker letters
- ink (Staz On, Distress Ink, etc.) it needs to be a pigment ink, or one that fairly durable so the colour transfers properly and it doesn't rub off right away.
- a blending tool, like a piece of high-density foam (Ranger/Tim Holtz sells these in many forms, or you can just use a makeup sponge)


I'm using American Crafts Thickers because I had some on hand! Keep them on the backing sheet while you ink them...it's much easier this way! Then, when you've finished colouring them you can pull them off and stick them on your layout.


Get some ink on your blender of choice. I'm using the foam sheets by Ranger. Just cut them down to a workable size.


Now you want to blend the ink right onto the letter. I didn't do any prep to the letters before, but if they are very glossy or have a really slick surface give them a quick rub with some sandpaper.


And that's pretty much it. The colour doesn't show up very well in these pictures, but it's the idea that I really wanted to showcase. They have a really neat vintage-y, distressed, aged kind of look to them because the ink is naturally darker in some areas than others.


You could also try:

- using Glimmer Mist, but you will need to sand the letters first
- Crackle Paint
- Alcohol inks...the glossy surface of a finished chipboard letter is perfect for alcohol inks. Just add a couple of drops and let it dry.
- Embossing powder...takes a little more time, and remember to hold onto those little letters with tweezers or something!

And now it's time for the shamless plug! I put these fabby new letters on one of the layouts in my fabulous Calendar Workshop! It is a super-fun class/workshop/kit, filled with twelve awesome layouts and lots of product at a great price!

Here is October's layout, with the new letters on it!

You can find pictures of each layout on the TM Classes Blog (tonight they will be up...I promise!) and I'm doing up a post for the main TM Blog as well. The classes were scheduled to start in November, but if you want to sign up we can still cover a lot in the remaining classes in December (the 2nd and 9th).

The kit itself will be for sale next week, filled with all the instructions and full colour pictures you will need to complete each layout on your own time. There are a lot of fun techniques in the calendar, and by coming to the store to complete it, you'll be able to use some fun product as well. Stuff you might not have at home!

I am really excited about this workshop...a lot of my blood, sweat and tears went into this calendar! And I hope that y'all can get a little inspired by this project and maybe tackle something similar for yourself this season. It not only makes a great Christmas present, it's a great reminder of the wonderful year you had and all the memories you will be making next year!

happy creating!

Friday, November 20, 2009

TOTW - Feathers

Awhile back, on a whim, the Saturday girls made a special Craft Store Field Trip and bought a whole whack load of feathers to make some hair clips. And when I say whack load, I sure mean it! I have a tonne left...and I thought I would put them to good use on a scrapbooking layout or two!


You will need:
- feathers, which you can purchase at Michael's for sure, but probably at other crafty type stores, or fabric stores.
- liquid glue, which I find is the best to attach them nice and good! Glue dots would also work.


Layout #1: Feathers & Chipboard
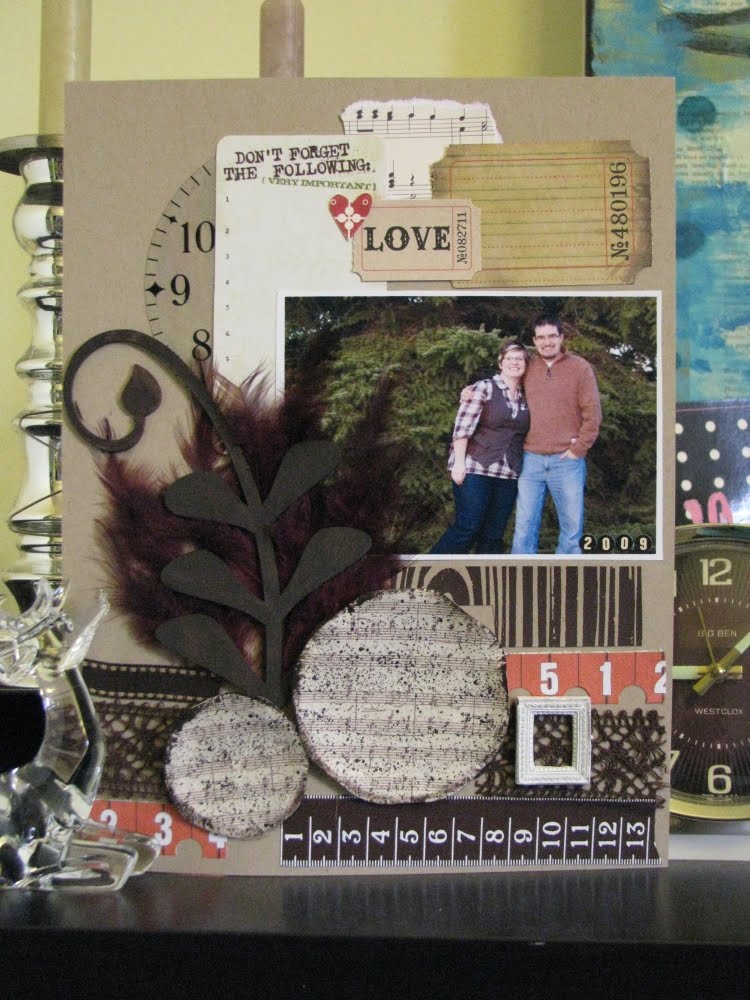
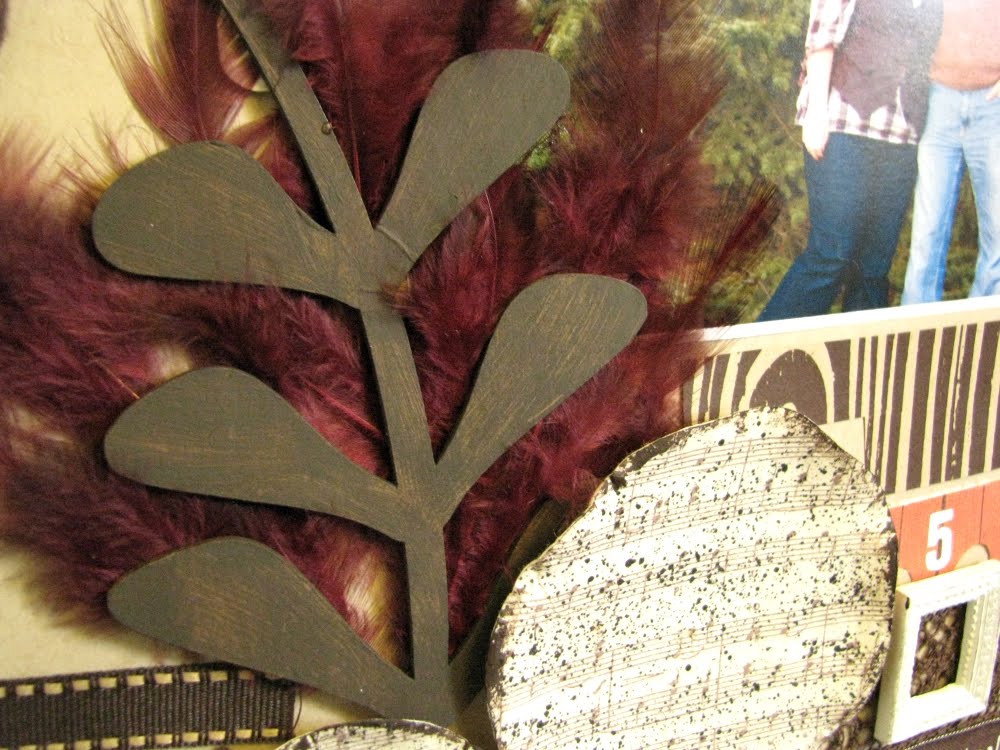
Adding some feathers to the back of a chipboard shape, finished or raw, is a great way to add some texture and dimension to an otherwise flat shape.
Turn your shape over, so the back side is facing up, lay down some liquid glue and start pressing your feathers down. Every once and a while, check out the right side of the shape so you know they are going in the right place


I really like how the feathers look behind this Riff Raff leaf. You could try adding flocking powder to your shape before adding the feathers for a different look altogether.


Layout #2: On their own...


A couple of feathers in a little bunch looks super great on any page! And in any colour. Tie some ribbon around the stems and call it a day!


You could also try:
- using larger feathers as a border along a photo
- putting a circle of feathers behind a flower
- using feathers as an embellishment on a layout about birds, or bird watching

Happy Creating!