Thursday, February 19, 2009

Featuring...Art Chix!

So, while I'm not necessarily running out of Techneek Ideas, I find myself running out of time each Thursday trying to get the post out in time. So this week I decided I'm going to change things up a bit!


Sometimes we find ourselves inspired by a colour combination, or an ad in a magazine, and sometimes all it takes is one look at the latest product line to hit the store! Featuring... is going to focus on a new line or company that we (treasured memories) carry. I'll show you a couple of ways to use the new product in your scrapbooking, card making or papercrafting, etc.

This week we got a whole whackload of stuff in the store (next week is looking to be the same!!), but the stuff that really caught my eye is from Art Chix, an online store and gallery based out of Victoria, BC. They carry a lot of great stuff for papercrafting, collage, and mixed media, but Chantel (and her Dad!!) thought they would give it a chance to appeal to our mostly scrapbooking clientele. Well, I'm hooked!!!


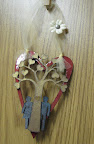
Our In-Store display...


A couple of collage sheets...
Faux postal stamp stickers...


Some of the metal charms...there are crowns, and bird nests, and faces, and boots, and wings, etc. etc.

And here is my layout. I used a couple of the Art Chix collage sheets...this style goes perfectly with my goofy heritage photo! I am missing my title, but otherwise I hope you get the idea! This stuff is really fun to play with and there are lots of different themes to suit any style! I really like the Winged Cuties (shown here) & City Delights collage sheets, and all of the charms!

Check out the Art Chix main website and online store here. They have boat loads of great collage sheets, buttons, charms, kits, buttons, etc. And check out the main TM Blog for more pictures of the stuff we got in store.

Hopefully I will be posting my other completed project tonight (once the little one has gone to bed!!)...I used more of the collage sheets, as well as some other lines that we carry that coordinate really well with the Art Chix line.

Happy Crafting!


Supplies Used:
- Art Chix: Mystical & Winged Cuties collage sheets, and gold Crown charm
- Pattern Paper: October Afternoon (polka dot), Making Memories (ledger), Sassafraslass (turquoise and ivory stripe)
- Creative Cafe calendar
- Heidi Swapp ghost clock
- 7Gypsies typewriter word, and word stickers
- Ranger Tim Holtz Inspire charm
- Scenic Route label sticker
- Assorted Ribbon

Saturday, February 14, 2009

...and other song lyrics...

I am a big fan of using song lyrics on my scrapbook pages...a BIG fan!! They are a great way to journal if you don't know how to use your own words. I think that if someone else has already said it better, might as well just go with it!!


I write down lyrics as I hear them (on the radio, on a CD, on my mp3 player), and that means I have lots of notebooks and random scraps on paper in my purse and around my house filled with random lyrics. I wanted to create something cohesive that I could use to write down some of my favourites...the ones I keep writing down over and over again!


Chantel and the gang brought this little 7Gypsies album home from CHA, and it worked perfectly for me, but any small chipboard or acrylic or homemade album will do...use what you have on hand. This is also a great time to play with those paint or stamps or Glimmer Mist you bought and haven't used yet because you're not sure what to do with it. Experiment! Have Fun! There are no rules with this album...okay there's one rule! I challenge you to only use your scraps or leftovers, random things left on your desk after your last creative session. These are probably your favourite things, new fun things that you can't get enough of! Make sure you love all the stuff you put in here...this album is just for you! And if what you love is simple patterns and rub ons...use that!! Don't feel the need to copy what I did exactly! This is just a suggestion to help get your creative juices flowing while completing a fun mini project!


You could also try:

- Doing a book of your favourite quotes, if song lyrics aren't your thing

- Get your friend/hubby/sister/daughter's favourite quotes/lyrics and do up a fun gift album

- Leave some pages blank to easily add more later


Looking for Lyrics? There are tonnes of lyric search engines on the web. Here are a few I found with a quick Google Search...
Song Lyrics.com

A-Z Lyrics

Lyrcs Search

All Lyrics


What others have done...
Scrapping the Music

Thursday, February 12, 2009

TOTW - Primary Colours

This week I took the easy way out - again - and my theme is "colour." This is just the way I think and scrapbook...so it makes sense to do another techneek with colour as my starting point.

You might remember a couple of weeks ago I did a layout with white as the dominating colour. And I think it fit perfect with my theme and photos. And this week I was inspired by another set of photos. The hubby, son & I recently visited a Lego Art exhibit at the local science centre. While it wasn't completely what we were expecting, it was still fun and I got some neat, colourful pictures.

This next photo was my inspiration for the primary colour theme for my techneek tonight!


I pulled together some of my favourite supplies in blue, red and yellow. As per my style, I didn't use all of the stuff in my pile, but it was nice to have some extra options!


And I also kept the background neutral, so it wouldn't compete with all the other colours I knew would make it on to the page. But to liven it up a bit, I added some bubble wrap detail with white paint. (I had placed my photos down first so I knew where to put my bubble wrap!)


This layout was super simple and once I started laying things down, I was done in less than 15 minutes. It's nice when you choose a colour theme...even just one or two colours...it keeps things simple and super easy.

And a close up of the title.

Supplies Used:

  • Pattern Paper: Hambly transparency, Doodlbug (dark blue), unknown blue damask (the cloud cut-out)
  • Prima "L is for" sticker
  • Jenni Bowlin star tickets, label stickers & red letter stickers
  • Doodlebug red sticker letters
  • Other: blue postcard from IKEA, bubble wrap & white paint, front cover of a memo note pad

Happy Creating!!

Monday, February 9, 2009

Bonus Project!

Missing the Techneek post on Thursday I felt bad, so I decided to create some extra Valentine's projects to share with you!

These guys are super-cute and fun to make, plus they look great hanging up around the house! Enjoy!


Just click on the image to see it up close and personal. I'm using the new Riff Raff chipboard Young Love and Layers of Love. The instructions? Pull out some Glimmer Mist, Glossy Accents, tulle, paint, jewels, pattern paper and have fun!

See you on Thursday...it's a work day but I still hope to have something fun to show you! Until then...

Friday, February 6, 2009

Valentine Project

What would Valentine's Day be without those piles of cute little lacy, frilly, sparkly Valentine's Cards!!?? Today I thought I would share my version...I'm not big on the sparkly/lacy/frilly, but I found a great stamp and went from there!


You will need:

- Pattern paper: I picked Making Memories pink polka dot

- Solid paper in a neutral colour: my pattern paper is double-sided, so I needed a solid to write my message on!

- Collage stamp: Mine is from Tim Holtz

- Black embossing powder & embossing ink (& a heat gun)

- Buttons to match

- Tickets or tags: I'm using the long red ones from Creative Cafe

- Ribbon: more Making Memories, this time pink with a velvet stripe

- Black pen to write your message


Step One: Assemble all of your supplies. I'm not really into "themed" things (paper, embellishments, etc.) so I just chose some generic embellishments that were Valentine colours - red, pink, & black. But if you really want to get into the spirit of the holiday, by all means go right ahead!


Step Two: Cover your stamp in embossing ink, and stamp onto your pattern paper. I didn't cut my pattern paper first...I hate having to line up the stamp with the cut edges. If I stamp it crooked I can just cut the edges to make it look straight!


Step Three: Sprinkle embossing powder over the stamped image. Tap off the excess.


Step Four: Use the heat gun to set the embossing powder.


Step Five: Cut out around the stamped image. My stamp is about 2.5" by 3.5", so my completed tag is 2.75" x 3.75"


Step Six: Embellish your tag! I kept mine really simple and just added a button and a ticket, and a piece of ribbon at the top.


Step Seven: Add a neutral solid to the back of your tag and write you message!


Repeat as needed!!


Happy Creating!!

-----

P.S. Sorry about the lack of Techneek post on Thursday. The project I was working on did NOT turn out as planned, and I had no backup, and it was late...so...

Next week...I promise!

Wednesday, February 4, 2009

The Missing Link!

Here is the photo I promised...a week ago, I know!...of the finished page in my Techneek of the Week: Stamping. The layout is displayed on the front board at Treasured Memories if you want a real-life look!

Enjoy!


And I'll see you back here tomorrow for another TOTW...

later,

Supplies Used:
- Paper: Bazzill (black), Basic Grey (pattern), scrap brown bag
- 7Gypsies calendar ATC
- Maya Road chipboard flourish
- Prima flower
- Creative Cafe black buttons
- stamps: Heidi Swapp (polka dots), 7Gypsies (date, clocks, oval), Bam Pop (speech bubble)
- Ranger Glossy Accents
- unknown: black embossing powder, embossing ink

Saturday, January 31, 2009

The Best Things in Life

The Project this week is an extension of a previous week's project...but this time I've got step-by-step photos!! Woot!!


I am masterfully in love with the Letters by Janna shapes we have in the store. You might remember the star I decorated awhile back (here's the link). This week I grabbed the smallest flower shapes and got to work! It is a super fun size and shape to work with. And the possibilities are endless...pink for a girls room, ivory and black for wedding decor, a housewarming gift in the colours of the new home, etc. etc. I love them!!!

You Will Need:


  • An MDF shape. Right now Treasured Memories has two sizes of hearts and stars, and three sizes of flowers, but you can also order them directly from Letters by Janna. I am using the smallest flower ($12) for my project.

  • Gesso/primer: I used gesso to prime the surface before I started applying the papers and ink, but any kind of primer or white paint will work. This just gives a nice even surface to start on. And if you're not keen on the white gesso, you can tint it with a little bit of any acrylic paint. I used some yellow in mine.

  • Pattern papers: scraps work great for this, as you are going to rip and tear them and if you cover them in more paint the colours and pattern will be muted.

  • Paint: I used yellow, red, and black. I really like the new Claudine Helmuth line we carry in the store...her paints go on really smooth. But any craft or acrylic paints works well here.

  • Matte Gel Medium: I use this to adhere all of the pattern papers, and seal them. White glue works to adhere the papers, and you could use any kind of varnish or sealer (water-based) that you have on hand. Matte is just my preference.

  • Glimmer Mist, foam stamps, rubber stamps, letter stamps, chipboard shapes, charms, etc. Grab anything you might want to use to further embellish your shape once you have the base down. I'm using Riff Raff Designs peacock and a big Prima flower. As well as some red and gold Glimmer Mist to give a little shimmer!

Before I did anything else, I painted my chipboard peacock so it would be dry by the time I wanted to use it. I used Black Claudine Helmuth paint, as well as some black Ranger crackle paint for texture.


Some Helpful Hints: Your project might go through an ugly phase, but you've got to just ride it out and keep going! Remember that this is about layers...lots and lots of layers. So if you do something that doesn't end up looking very nice, just add another layer and keep playing with it until you like it!

Also, it's a good idea to let each layer dry completely before you add on to it. This way it's easier to rub off the paint/gesso/Glimmer Mist etc. if you don't like it, without wrecking the layer behind. If you are impatient (!!) use a heat gun or hair dryer to speed up the process!!


Step One: Assemble all your supplies...you don't want to be running around looking for things.


Then prime the entire shape with gesso. I mixed mine with a little bit of yellow paint, because I didn't want the bright white background.

You can mix it before you apply it to the shape, or as you go, it doesn't matter. At this stage it can be super messy and ugly...you will be adding a lot more layers.


Step Two: Start ripping your pattern papers and gluing them down. I'm using my Gel Medium to adhere them to my shape with the same brush I used for the gesso...and I didn't clean it off! This way the papers are already starting to blend into the background colour.

Keep ripping and gluing as you go, filling in empty spots and balancing out the pattern and colours.
Here you can see how they blend into the background, but you can still see the basic shape and texture of the paper.

Once I got my layer of papers down, I covered them with a light coat of gel medium mixed with the gesso/paint mix. You can wipe this off if you apply it too heavy...use a wet paper towel or a baby wipe. Try wiping more off in some areas to let the pattern paper show through!
Step Three: Once that dried, I sprayed some Brick and Antique Gold Glimmer Mist over my project. This gives a lovely shimmer to the piece and adds a little bit more (subtle) colour.


Here's a close up. Remember, the more Glimmer Mist you add, the brighter the colour will be. I like using colours that match well with the background, so they begin to blend in with the papers once they dry...you don't want them to completely obscure the layer you have already laid down.

Step Four: Once the Glimmer Mist dried, I began to add more paint. I'm using red and black Claudine Hellmuth, but any acrylic paint will work fine. The best way to apply this, and not get too much paint, is dry brushing. Get some paint on your brush, wipe most of it off (a paper towel or rag works), then gently brush it onto your shape. The texture it produces it great, plus you can gradually build up the colour without adding too much at once.


I found that the black when dry brushed over top of the pattern paper picked up and accentuated the edges of the papers and left a really amazing texture! And as I edged the piece with black paint, I brushed a little bit over the edges to further define them.

And here's the finished shape!! I finished it with some Prima flowers and a Creative Imaginations brad.
And my peacock looks great all crackly.

You could try:
  • Adding some lettering with stamps or sticker letters
  • Add a photo (or two!)
  • Hang a gem or button or whatever in the centre of the flower using ribbon or wire.
  • Hang the entire shape using a lovely ribbon or tulle (reinforced with wire!)

And yes, I am TOTALLY teaching a class on this in February!! Check out the calendar here.

See you next week!