Thursday, January 29, 2009

TOTW - Stamping 2 for 1

Not so long ago my friend and co-conspirator Juli taught a class called "Stamping: Not Just for Cards Anymore." In this class she taught her students how to use their stamps in their scrapbooks to embellish their layouts. And I think she was on to something!

The scrapbooking world has really embraced stamps as another awesome way to embellish and enhance layouts. You can buy large sets of flourishes or frames, and even more popular are the $1 - $2 single stamps. And as always, letter stamps are a great investment. Especially for those of us who aren't into personal die-cut systems.


For this Techneek of the Week, I am going to go over two possible ways to use stamps on your scrapbook layouts. And I apologize now for all the photos I uploaded...Blogger flipped most of them!! Oops! And this is a very picture-heavy post, so you'll just have to bear with me! Thanks.

Techneek #1: Embossed Background
You will need:

  • A stamp to use as a background...I am using a Heidi Swapp foam polka dot stamp. These work really well with paint, but I am going to show you how to use it with embossing powder!

  • An embossing stamp pad...VersaMark, etc.

  • Black embossing powder...or whatever colour matches your background cardstock
First, choose the colour of cardstock you want as your background. I chose black, because I always like to have a neutral background (white, kraft, black). I wouldn't choose white or kraft for this, but any other colour would be great! Make sure you have embossing powder in the same colour OR some clear embossing powder and a good clean embossing ink pad.


Grab your background stamp and get it covered in embossing ink. I chose polka dots because they look good when repeated over an entire background.
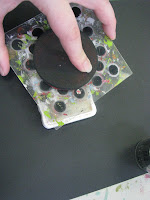

Once it's covered in ink, press it down on your background. It helps to start in the upper corner and work your way down and across in order to cover the entire background. I'm not too worried about getting all my dots to line up perfectly (am I ever worried!!), but if you are you might want to use a ruler or a special tool to line your stamp up each time you press it down.


After you've stamped your image once, sprinkle your embossing powder over the wet ink, and tap off the excess. You don't need to use your heat gun right away...we are going to get the background fully stamped and powdered up and emboss it all at once.


So keep stamping and sprinkling your embossing powder on until you have sufficiently covered your background. Like so...


Now you can run your heat gun over the whole background and set the powder.


And now you have a super cool background! All shiny and nice!


Now I will show you how I finished my layout...using some more stamps. If you would rather do your own thing, go right ahead! But don't forget to check out the next Techneek...just keep scrolling down!


To finish my layout, I wanted to use some more stamps to accommodate my journaling and add some more interest to my layout. I also wanted to include some colour, but only in the pattern paper so I used black ink and kraft paper for my stamped images.


Grab some journaling stamps in a variety of sizes and shapes. Most of mine are circular or oval in shape, to match the polka dots in my background, but you can use whatever you have on hand!


Here I stamped my journaling stamps on some kraft paper. Cut out your shapes and put them aside.

Now I want to show you a neat technique involving ripped paper! You might have noticed that I left some blank spots on my background. I wasn't worried about covering every inch of my black paper because I knew I wanted to cover parts of it with my pattern paper (and my photo...duh!). When done right, this will look like the pattern paper was actually on top and you just ripped pieces of it away to reveal the cool embossed paper underneath! WOWEE!


To start, pick some pattern paper and choose where you want it to be. It's easiest to add the pattern on the edges first, then add some in the middle of the page if you want to (I only added it along the edges, so for in the middle you're on your own!!).


Mark on your pattern paper where the edge will be (the edge of the background paper). Now you can tear your pattern paper.


It doesn't have to be perfect the first time. You can keep tearing away bits until you have a look you like.


I even rolled up some of the torn edges to further enhance the look. You could also crumple and ink your pattern paper.


Here's the finished torn piece of paper. I crumpled it up and rolled the edges to make it look really ratty!


Stick it down, and find another spot that could benefit from some torn paper action. It helps to know where your photo is going to be on the finished layout.

Now here is where your journal stamps come into play...position them on the background so they can be used in sequence to tell your story.


And I can't believe I didn't take a picture of the finished layout! DUH!! I will try to find that for you guys before the day is over!


Techneek #2: Stamps as Embellishments

You will need:
  • A single image stamp...make sure it's not too complicated and can be used in multiple locations on your page. I am using a Heidi Swapp chandelier. A simple shape like a heart, star, tree, animal would be great as well.

  • Black ink pad

  • A liquid glue pen...this works best to apply glitter to a detailed image (like a stamp). I'm using one made by ZIG

  • Glitter...I am using gold Melissa Frances, but any colour or brand will do.
This one is super easy, and might even seem a little bit obvious. But I thought I would get my two cents in here, and show you how Lisa works the stamps!

I am a big fan of repetition on a layout. By repeating the same colours and embellishments you unify the layout and make it easy on the eyes, a treat to look at! And if you repeat things in a triangular pattern, your viewer's eye will know where to look and what is important on your layout. It's a simple thing that can make a big impact. The next time you look at one of your favourite scrapbooker's layout, see if she is repeating the same elements in various locations on her layout and where.

First you will need to gather your supplies...and start stamping! I stamped my chandelier image on the same pattern paper as I am using for my background. I want the image to stand out, but not too much! The Basic Grey "solid" works great for this! Stamp three images...two will remain black and one we are going to add some pizazz to with some glitter!

PLEASE NOTE: Putting glue on your stamp before stamping it and applying the glitter DOES NOT WORK! Trust me...I tried it. And as Jill predicted, all I got was a glue-blob on my layout and the glitter didn't stick. I do all the dirty work so you don't have to! Tee Hee!

Now you can "draw" on your stamped image with your glue pen, a little at a time, and sprinkle the glitter over it. Tap off the excess and keep going until you have covered the entire shape with glitter.


And now you've got a sparkly shape that you made yourself!! Ooh la la!


Cut out all three of your shapes...it doesn't have to be perfect, just get the basic shape.


And place them on your layout in a triangular pattern. I added some Hambly transparent frames for a little colour. (Crooked photo alert!)


Now you can finish embellishing your layout. If you focus on adding embellishments to the areas around your stamps, you will just reinforce the triangular pattern and make your layout more unified and good-looking!!


I hope you enjoyed today's Techneek. There are so many different ways to enhance your scrapbooks with stamps, I just picked two of my favourite for today. I will be coming back to this topic in the future, no doubt, and hopefully I'll give you another reason to dust off your stamps and create!
Later,
P.S. I totally have a project in store for you this weekend...it's a repeat, but still good! With instructions and everything. I promise!!

Wednesday, January 28, 2009

Store Pics!

I'm working on the TOTW today at work, but in the meantime enjoy these pics of the store!


Jill works so hard at her store displays I thought I would feature the new Spring one here. Enjoy the eye candy...and come in to the store to check out the real thing! And I'll see you here tomorrow for Techneek of the Week!
later,

Thursday, January 22, 2009

TOTW - Use Your Scraps!!

I am a keeper of scraps. I have lots and lots of them, and I even get them as gifts from other scrappin friends!! I don't mind...I hate to waste paper and sometimes a scrap is exactly what I need to complete a layout! I even save scraps of ribbon, packaging - both from scrapbooking supplies and toys - and I keep them all together and at the ready!

For the Techneek of the Week today, I am going to show you a super easy way to dip into some of those scraps of paper I know you've been saving!

You will need:
  • Lots of scraps of pattern paper. Even if you don't save your scraps, you can still make use of this techneek. Just rummage around on your crafting table for some leftovers from your last project. They don't have to match each other!!

  • A circle punch - any size will do. I used my 3/8" punch, which works well for this layout which requires lots of small circles.

I keep all of my larger scraps sorted by colour. I put them in a small plastic bag or page protector and store them with my larger patterns (on an organizational note, I use to sort all of my papers by company, but I would always have some company's with only one sheet of paper, so I ended up with a HUGE miscellaneous file! Now I keep my most favourite companies together, and sort everything else by colour. I have also learned that I plan a layout and choose paper by colour, so it made the most sense for me!)


Grab your circle punch and start punching! I punch between 3 and 6 circles from each pattern.


Keep punching out of a variety of patterns and colour until you have a respectable pile. You may or may not use all of these (I sure didn't!), but if you don't you just have some ready-to-go scraps the next time you need them!!


Don't forget about those transparencies...they look awesome too!


Make a mark where your photo (or photos) is going to go. This will help you place your circles, and if you stick it down it's harder to change your mind later!


Start placing them down on your background sheet of paper. For this techneek I chose one that has a grid pattern. This makes it easy to line up all of your punched out circles. Don't choose a background with a busy pattern...your circles will disappear when you stick them down. If you want to use a pattern paper as your background, punch out your circles from solid paper instead of pattern and see what happens!


Once you've got a nice pattern going with your circle scraps, glue them down. Make sure you still like where your photo is going to end up. I glued my circles down with a little dab of glossy accents right in the middle. I liked how the edges lifted up and made it look like the circles were just floating on the page!


I wanted to keep the focus on the circle pattern I created, so I didn't want to add a lot of extra embellishment. Instead I chose to embellish the circles themselves! I used some Doodlebug bling and some random buttons to add some sparkle and dimension to my circles.


I still wanted a little more dimension, but I wanted to stick with my "circle theme" so I found some round embellishments: these fab gears by Riff Raff Designs. I painted them a navy blue and sprayed with Denim Blue Glimmer Mist for a little extra sparkle. They look great on the page and don't distract from the awesome circle design.


The finished layout! I added the title in the space left by my circle pattern, and will write in the date later. See all the leftover circles...I'm going to stick them in their own baggie so they're ready the next time I want some circles!
You could also try:
  • Experiment with different sized punches. Use a larger one, or lots of different sizes on the same layout.

  • Try using scraps that are all from the same colour family, and choosing a complimentary colour as your background.

  • Punch out any shape you like - scalloped circles, squares, stars, hearts, etc. I would recommend avoiding those little tiny shapes as they won't look like much on a big layout, even if you use a lot of them.

That's all for now. I'm going to put the Project of the Week on hold for a little bit. With Juli busy with her own stuff, it's too much for me to handle all at once! But I'll keep the Techneeks going as long as I can!

Check back next week for a special CHA Edition of TOTW...Chantel and the gang will be back by then and I hope to have lots of freebies to work with!!

Later,

Thursday, January 15, 2009

TOTW - Rockin' the Monochromatic

I don't know if you've noticed, but I really like monochromatic colour schemes on my layouts and projects. I usually stick to one colour or colour family, with a dash of a contrasting colour to liven it up. With all the snow we've been getting up here in E-town, I thought I would share a fun way to do a white layout.

The key to pulling off a white layout is texture...and lots of it! If you are using multiple patterns and textures on a colourful page it gets too busy and your eye doesn't know where to focus. And it just ends up looking bad. But on a monochromatic page, as long as your different patterns and textures are the same colour it looks good!


You will need:
  • White cardstock for your background
  • White embellishments: I like ribbon, tulle, mesh, felt - things with texture. Grab some buttons and brads as well.
  • Anything else in your stash that's white, like chipboard letters, tags etc.
  • White paint and bubble wrap...to create the texture in the background
  • A text stamp and a light-coloured ink pad. I'm using a light blue because it goes well with the blue sky in my photos.


The key to this techneek is to keep adding layers until you have something you're happy with. I started with a big pile of white things and then tried the ones I thought would look good, and set aside the ones I didn't like. You won't use everything in your pile, but it's helps to get you started.


Tip: When applying paint to your bubble wrap, squirt a big pile on then spread it around with a popsicle stick. Works super.


I applied the painted bubble wrap all over the background paper. Press down, then lift it up, move it over, and press it down again. There's no need to apply more paint in between each application. It looks better if the bubbles are uneven.


I used the text stamp sparingly, and only to add some extra colour and texture behind my photos, kind of like a photo mat. It helps if you remove some of the ink before stamping it down on your paper...you can always add more but you can't take away.


And here's the finished layout...the colours look kind of wonky because I took these photos in my basement. I will re-take them tomorrow when there's some good light outside! You can click on the photo to get a better look. I love how the focus is totally on the photos, because everything around them is in the same muted tones of white and off-white.


Tip: I took these boring white chipboard letters and jazzed them up by pressing them into the still-wet bubble wrap! Sweet!


I'll try and get something done for the project on Saturday...Juli is super busy with school, work, work and her new Wedding Planning business! So while I wish her the best of luck I miss her help!!

Tuesday, January 13, 2009

Wooden Star Project

This Just In...the store. We have a whole new batch of shapes from Letters by Janna, and they are awesome! I couldn't help myself, and took home a star before I even knew what I was going to do with it! But now I'm glad I did, because it turned out beautifully.


This project is great for new babies, housewarmings, or just because. The shapes come completely unfinished, so you can decorate them in whatever way you'd like: crazy like mine, or with just a coat of paint or stain.

You will need:


  • Large Wood Shape: Right now Treasured Memories has two sizes of hearts and stars, and three sizes of flowers, but you can also order them directly from Letters by Janna. I am using the smaller star ($16) for my project. The large star and heart cost $21.

  • Gesso/primer: I used gesso to prime the surface before I started applying the papers and ink, but any kind of primer or white paint will work. This just gives a nice even surface to start on.

  • Pattern papers: scraps work great for this, as you are going to rip and tear them and if you cover them in more paint the colours and pattern will be muted.

  • Paint: I used white paint (gesso works for this as well), green and blue. Any craft or acrylic paints works well here.

  • Matte Gel Medium: I use this to adhere all of the pattern papers, and seal them. White glue works to adhere the papers, and you could use any kind of varnish or sealer (water-based) that you have on hand. Matte is just my preference.

  • Glimmer Mist, foam stamps, rubber stamps, letter stamps, chipboard shapes, charms, etc. Grab anything you might want to use to further embellish your shape once you have the base down.

Here are some close ups of the shape.


And the charms at the bottom. I am a big fan of hanging things off other things. So I attached some dangly things off the bottom of the star with some wire.


I will post some step-by-step pictures later in the week, so check back. I'll also have something fun for the Techneek of the Week in Thursday!

If you have any questions about this, or any other project or Techneek, feel free to email me! lisakercher@gmail.com

_____________________________________________

I am looking for class suggestions...layout, mini-album, technique, etc. You can email me with your ideas. This will help me out SO MUCH in planning next month's schedule. Thanks!

Thursday, January 8, 2009

TOTW - Challenge Me!

If you've ever visited my personal blog you'll see that I love a scrapbook challenge! And there are so many blogs and websites that I can visit to get my fix! I haven't been participating in a lot of these lately, but in the past whenever I was in a creative rut, or needed a jumping of point for a difficult set of photos, or even when I was just in the mood to have some fun I can turn to any of these sites for a little inspiration and a kick in the butt!

And now with the New Year upon us, so many of us are setting goals relating to their scrapbooking: getting more layouts done, taking more/better photos, spending more time with my scrapbooking buddies, etc.

SO, as the first "Techneek" of 2009 I am issuing a challenge to all of my readers out there... pick one of the Challenge Blogs below (or find one on your own) and TAKE THE CHALLENGE!! Then post your layout on your blog, or on Flickr, or on SIStv, or anywhere, and link it up in the comments here. I can't wait to see what everyone picks!

Here's my list of favourite Challenge/Inspiration Blogs. Some I have been visiting for a long time, and some I've just discovered recently through other sites and other bloggers. Regardless of your taste in scrapbooking, there should be something here for you! And if your favourite Challenge Blog isn't on my list, let me know!! I would love to add it!


And here is my completed challenge layout! I took the Scrapjacked Challenge. Essentially, these lovely ladies post a layout by another scrapbooker, and your challenge is to "scrapjack" it (aka "scraplift"). You can take elements of the original layout (colour, design, theme, etc.) and reproduce them in your own style.

You'll notice how I took the original design of the photo grid and changed it a little to fit my 6 pictures (instead of 11).

I also "lifted" the cute coloured doodles on the original. I used some of Lucas' crayons to colour in my scrap-graffiti.


And finally, I loved her use of the label maker to add captions to all of her photos...but I used mine to add more interest to the title block!


I hope you had fun playing along with my mini-challenge. Check back next week as always for another post from me! And I think we might even have something fun for you on Saturday...a little project to start the new year off right!

Later...