
See you back here on Thursday for a new Techneek inspired by these colours!
Until then...


With all the great and amazing new product scheduled to hit the store in the coming weeks, you should anticipate a lot more Featuring... spots!! Especially with the new Jenni Bowlin in the store. All of her stuff is always inspiring and fun to play with! But get it while you can...this stuff flies off the shelves like flies.


Her new line is very "Americana" with lots of cherries and stars, with blue and red dominating the colour scheme. There is even a journaling with a cow and the word "moo" on it!! Love it! One of the new items to hit the shelves are her pattern chipboard buttons...with text and pictures and ledger paper, they fit any style and are super fun! And her new stuff coordinates quite well with all her "old" stuff...which we also got restocked because I think all the TM girls are Ga-Ga for Jenni!
With that, here is a little extra Techneek to go with my Ga-Ga For Jenni layout!
Remember alcohol ink? Remember that it works on slick surfaces...like stickers? I desperately needed to change the colour of these stickers (I have a "thing" with mixing white and off-white), so I grabbed some Terracotta alcohol ink, an applicator felt thing and the wood applicator handle thing (all very technical terms...) and altered my sticker. Check it out...

Put ink on your applicator. You don't need a lot at all...a little goes a long way in this case!
Smear and smudge and rub your ink all over your sticker. I liked the swirly effect mine had going for it. The finished sticker is very orange (hey...I like orange) and matches my layout much more to my satisfaction!
 At any rate here is my completed layout...I got a new iPod for Valentine's and I wanted to commemorate the moment. I used the Starbucks "Pick-of-the-Week" card as my jumping off point. (Note: if you have an iPod and shop at Starbucks I highly recommend these little gems...a free song per week and usually it's a goodie! Plus they have free Wi-Fi so you can pick it up right there!)
Here is a close up of the Jenni letter stickers - there are a bunch to choose from and all have text or ledger pattern within the letters - and the pearls. I used a whole pack of pearls on my layout because they are my new best friend and are so cool and I really want to be seen with them so their coolness rubs off on me a little. Swoon.
I sprayed Peach glimmer mist and splattered some watered down black paint and Terra Cotta alcohol ink all over my background to add a little "rock star"
This line would go great with heritage or vintage photos, but as you can see from my layout her stuff also looks great alongside the latest of today's technology! Have fun exploring all that Jenni has to offer. See you Saturday...maybe I'll get my last Project post up as well and it will be a two-for!
Until next time...
Supplies:
- Jenni Bowlin: Pattern paper, label sticker, letter stickers, pearls
- Making Memories wordfetti stickers
- Assorted Ribbon
- Ranger alcohol ink
- Peach Tattered Angels Glimmer Mist
- Claudine Hellmuth black paint
Don't forget about the giveaway! Everyone who leaves a post anywhere on the blog between now and next Thursday has a chance to win some Glimmer Screens from Tattered Angels. Good Luck!
 I feel so bad that I missed the Project this weekend, so to make up for my guilt it's Giveaway Time again on the Blog! I have had these super cool Tattered Angels Glimmer Screens sitting around for the longest time, just waiting to be used for a Techneek. But they never made it out of the bag...so I want to pass their awesome-ness on to you, my loyal readers!
Please post a comment below for your chance to win! I'll be drawing the winning name on Thursday, March 5th so that gives you a little over a week to enter.
Good Luck!
And I'll be back on Thursday with another Techneek...I have a neat one using Glimmer Mist that I'd like to share!
So, while I'm not necessarily running out of Techneek Ideas, I find myself running out of time each Thursday trying to get the post out in time. So this week I decided I'm going to change things up a bit!
Sometimes we find ourselves inspired by a colour combination, or an ad in a magazine, and sometimes all it takes is one look at the latest product line to hit the store! Featuring... is going to focus on a new line or company that we (treasured memories) carry. I'll show you a couple of ways to use the new product in your scrapbooking, card making or papercrafting, etc.
This week we got a whole whackload of stuff in the store (next week is looking to be the same!!), but the stuff that really caught my eye is from Art Chix, an online store and gallery based out of Victoria, BC. They carry a lot of great stuff for papercrafting, collage, and mixed media, but Chantel (and her Dad!!) thought they would give it a chance to appeal to our mostly scrapbooking clientele. Well, I'm hooked!!!
Our In-Store display...

A couple of collage sheets...

Faux postal stamp stickers...
Some of the metal charms...there are crowns, and bird nests, and faces, and boots, and wings, etc. etc.
And here is my layout. I used a couple of the Art Chix collage sheets...this style goes perfectly with my goofy heritage photo! I am missing my title, but otherwise I hope you get the idea! 
 This stuff is really fun to play with and there are lots of different themes to suit any style! I really like the Winged Cuties (shown here) & City Delights collage sheets, and all of the charms!
Check out the Art Chix main website and online store here. They have boat loads of great collage sheets, buttons, charms, kits, buttons, etc. And check out the main TM Blog for more pictures of the stuff we got in store.
Hopefully I will be posting my other completed project tonight (once the little one has gone to bed!!)...I used more of the collage sheets, as well as some other lines that we carry that coordinate really well with the Art Chix line.
Happy Crafting!
Supplies Used:
- Art Chix: Mystical & Winged Cuties collage sheets, and gold Crown charm
- Pattern Paper: October Afternoon (polka dot), Making Memories (ledger), Sassafraslass (turquoise and ivory stripe)
- Creative Cafe calendar
- Heidi Swapp ghost clock
- 7Gypsies typewriter word, and word stickers
- Ranger Tim Holtz Inspire charm
- Scenic Route label sticker
- Assorted Ribbon
You could also try:
- Doing a book of your favourite quotes, if song lyrics aren't your thing
- Get your friend/hubby/sister/daughter's favourite quotes/lyrics and do up a fun gift album
- Leave some pages blank to easily add more later
Looking for Lyrics? There are tonnes of lyric search engines on the web. Here are a few I found with a quick Google Search...
Song Lyrics.com
A-Z Lyrics
Lyrcs Search
All Lyrics
What others have done...
Scrapping the Music
This week I took the easy way out - again - and my theme is "colour." This is just the way I think and scrapbook...so it makes sense to do another techneek with colour as my starting point.
You might remember a couple of weeks ago I did a layout with white as the dominating colour. And I think it fit perfect with my theme and photos. And this week I was inspired by another set of photos. The hubby, son & I recently visited a Lego Art exhibit at the local science centre. While it wasn't completely what we were expecting, it was still fun and I got some neat, colourful pictures.
This next photo was my inspiration for the primary colour theme for my techneek tonight!
I pulled together some of my favourite supplies in blue, red and yellow. As per my style, I didn't use all of the stuff in my pile, but it was nice to have some extra options!

And I also kept the background neutral, so it wouldn't compete with all the other colours I knew would make it on to the page. But to liven it up a bit, I added some bubble wrap detail with white paint. (I had placed my photos down first so I knew where to put my bubble wrap!)

This layout was super simple and once I started laying things down, I was done in less than 15 minutes. It's nice when you choose a colour theme...even just one or two colours...it keeps things simple and super easy.
 And a close up of the title.
Supplies Used:
Happy Creating!!


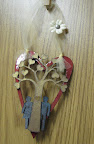


Step Five: Cut out around the stamped image. My stamp is about 2.5" by 3.5", so my completed tag is 2.75" x 3.75"

Step Six: Embellish your tag! I kept mine really simple and just added a button and a ticket, and a piece of ribbon at the top.

Step Seven: Add a neutral solid to the back of your tag and write you message!
Repeat as needed!!

Happy Creating!!
-----
P.S. Sorry about the lack of Techneek post on Thursday. The project I was working on did NOT turn out as planned, and I had no backup, and it was late...so...
Next week...I promise!

